_800x600%20(1).webp)
6.5.2026
Insulation Inspection for ADUs, Additions, and Home Remodels
This is the default text value
This is the default text value
This is the default text value
,
This is the default text value
This is the default text value
Lorem ipsum dolor sit amet, consectetur adipiscing elit. Suspendisse varius enim in eros elementum tristique. Duis cursus, mi quis viverra ornare, eros dolor interdum nulla, ut commodo diam libero vitae erat.
Default Button Text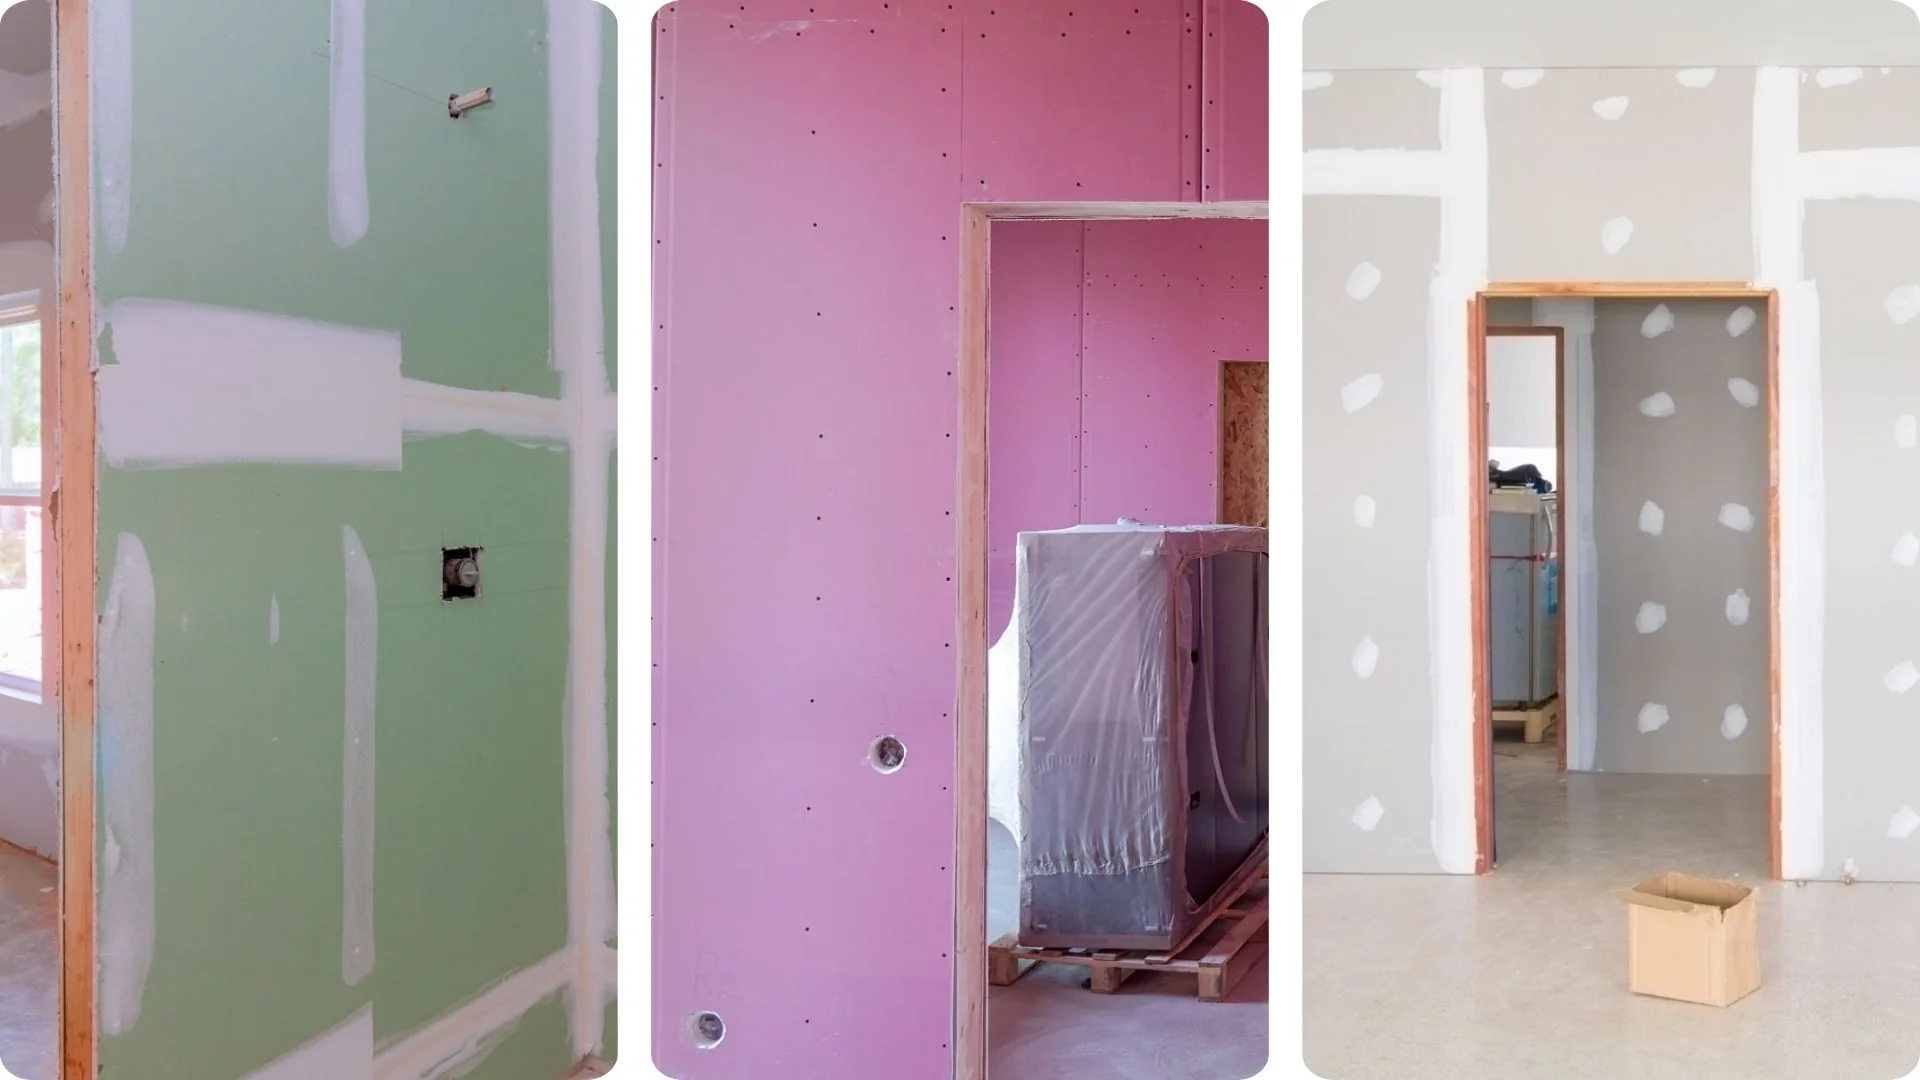
Drywall is one of the first stages where a construction project starts to feel like a real home.
After framing, rough electrical, rough plumbing, HVAC, insulation, and required inspections, the walls and ceilings begin to close. For homeowners, this is exciting because the rooms finally take shape. Door openings feel complete. Ceiling lines become easier to understand. The project starts to feel closer to paint, cabinets, tile, flooring, trim, fixtures, and final completion.
But before the project moves into taping, mudding, sanding, texture, primer, paint, tile, cabinets, flooring, trim, and final finishes, many permitted projects require a drywall nailing inspection.
At Global Arch Construction, we treat this inspection as an important checkpoint. The drywall panels may be installed, but the fasteners still need to remain visible so the local building inspector can verify the drywall installation before it is covered.
Even though many drywall crews use screws today, this inspection is still commonly called a drywall nailing inspection. The inspector may review screw spacing, nail spacing, fastener depth, drywall thickness, board type, garage separation, Type X drywall where required, ceiling board installation, electrical box openings, wet-area materials, and approved plan details.
For homeowners, the simple explanation is this: the drywall nailing inspection helps confirm that the drywall is ready to be covered before the finish stage begins.
A drywall nailing inspection is a local building department inspection that usually happens after the contractor installs drywall but before drywall fasteners and joints are covered.
The name can vary depending on the city, county, or permit card. Some building departments may call it a drywall inspection, wallboard inspection, gypsum board inspection, lath and gypsum board inspection, or drywall nailing inspection.
The purpose is usually the same.
The inspector wants to verify that the drywall has been installed and fastened before the screws, nails, joints, and key details are hidden by tape, mud, texture, primer, or paint.
This inspection is not only about nails. In many modern projects, drywall screws are used instead of nails. The inspection is still called a nailing inspection because the building department is checking how the drywall is attached to the framing.
For homeowners, drywall nailing inspection helps protect the project before the next layer of work begins.
If drywall is not fastened correctly, problems can show up later as loose panels, nail pops, screw pops, cracking, visible seams, uneven ceilings, damaged corners, or finish defects. If the wrong drywall type is installed in a required garage separation area, ADU separation area, ceiling assembly, bathroom, laundry room, or other special condition, the project may need corrections before it can continue.
This inspection helps catch issues before the drywall crew tapes and muds the joints.
That matters because once the drywall is taped, finished, textured, primed, painted, tiled, or covered by cabinets and trim, corrections become more expensive, more disruptive, and harder to blend cleanly.
A properly managed drywall nailing inspection helps the project move forward with fewer surprises.
Inspection requirements depend on the permit card, approved plans, project scope, local building department, and field conditions.
A full ADU, garage conversion, home addition, whole-house remodel, or fire damage restoration project may have different inspection requirements than a small drywall patch or cosmetic repair. Some jurisdictions inspect broad drywall work. Others may focus more closely on garage separation, fire-rated assemblies, wallboard in certain areas, or specific details shown on approved plans.
That is why the contractor should always check the permit card and approved inspection sequence before moving forward.
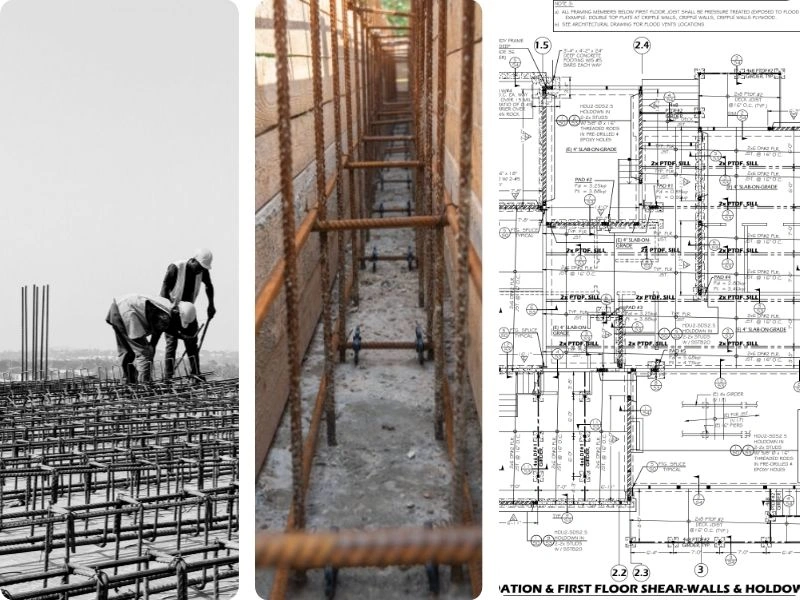
Drywall nailing inspection usually happens after insulation inspection is approved and after drywall panels are installed.
A typical construction sequence may look like this:
Planning, design, permits, demolition, framing, rough mechanical work, rough electrical work, rough plumbing work, insulation installation, drywall installation, city or county drywall nailing inspection, tape and mud joints, sand drywall finish, texture finish, primer, paint, tile, cabinets, flooring, trim, doors, fixtures, punch list, and final inspection.
The timing is very important.
The drywall should be installed and fastened, but the fasteners should still be visible. The contractor should not cover the fasteners with joint compound, tape, texture, primer, or paint before the required drywall nailing inspection is approved.
During the drywall nailing inspection, the inspector may review several items depending on the project scope and approved plans.
This may include drywall panel installation, wallboard installation, ceiling board installation, fastener spacing, fastener depth, panel edges, screw pattern, drywall thickness, Type X drywall where required, garage separation walls, ADU separation areas, electrical box openings, moisture-resistant drywall, tile-ready areas, penetrations, approved plan details, and whether previous required inspections have been completed.
For homeowners, this means the inspection is not only about nails or screws.
It is about confirming that the drywall stage is ready before the work is hidden.
The drywall nailing inspection is generally a code and approved-plan inspection. It is not the same as the contractor’s final drywall quality-control review.
The local inspector may check fasteners, board type, garage separation, fire-rated assembly details where required, electrical box conditions, and whether the work matches the approved plans. The inspector is usually not there to approve every cosmetic detail, texture blend, sanding mark, paint-ready surface, or final appearance issue.
That responsibility belongs to the contractor.
City or county approval means the drywall nailing stage has passed inspection. It does not replace the contractor’s own review for seams, corners, sanding, texture matching, patch blending, paint readiness, and final finish quality.
This is where a good contractor protects the homeowner after the inspection passes.
A board inspection checks whether the correct drywall panels were installed in the correct locations.
This matters because not every drywall panel is the same.
A standard dry interior wall may use regular drywall. A ceiling may require a specific drywall thickness or installation pattern. A garage separation wall may require gypsum board installed according to the approved plans. A ceiling below habitable space may require Type X drywall. A bathroom or laundry area may require moisture-resistant drywall where approved. A shower or tub surround may require tile backer board and waterproofing instead of regular drywall.
Before the inspector arrives, the contractor should check that the drywall is not broken, loose, wet, damaged, incorrectly cut, or installed in areas that were not ready to be covered.
Fastener inspection is one of the main reasons the drywall nailing inspection exists.
The inspector may check screw spacing, nail spacing, screw depth, fastener type, panel edges, ceiling fastening, wall fastening, and fastening in garage separation or fire-rated areas where required.
Fastener spacing is not one universal rule for every condition. It can depend on drywall thickness, framing spacing, wall or ceiling location, fastener type, board orientation, and the approved assembly.
Fasteners should hold the drywall securely without damaging the panel. If screws are too shallow, they may create bumps that show through the finish. If screws are too deep, they can break the drywall paper and weaken the attachment. If screws are missing or spaced too far apart, the panel may not be properly secured.
Fastener inspection may seem small, but it protects the wall and ceiling system.
Good fastening helps reduce movement, cracking, nail pops, screw pops, and finish defects.
Garage separation is one of the most important areas to handle correctly.
A contractor should be careful with this wording because garage separation requirements depend on the approved plans and the specific condition being built.
In many residential projects, walls between the garage and the residence or attic may require gypsum board on the garage side. When there is habitable space above a garage, the garage ceiling may require 5/8 Type X gypsum board or equivalent. Other supporting structures, walls, ceilings, or assemblies may have additional requirements depending on the project.
During drywall nailing inspection, the inspector may review garage separation walls, garage ceilings below living space, drywall thickness, board type, fastener spacing, penetrations, and whether the work matches the approved plans.
For homeowners, this is not just a technical detail. It is part of building the home correctly before the work is covered.
Some walls and ceilings require special drywall because they are part of a fire-rated assembly, rated wall, rated ceiling, or separation detail shown on the approved plans.
This may apply to certain ADU separation walls, duplex conditions, garage ceilings below living space, mechanical areas, utility areas, or other assemblies required by the approved documents.
In these locations, the contractor may need to install Type X drywall, install 5/8-inch Type X drywall, install fire-rated gypsum board, or follow a specific wall or ceiling assembly detail.
The inspector may review drywall type, thickness, fastener spacing, number of layers, joints, penetrations, boxes, ducts, pipes, fire blocking, and other required details.
Bathrooms, laundry rooms, powder rooms, utility rooms, and some kitchen areas may need special attention during drywall nailing inspection.
Moisture-resistant drywall may be used in certain moisture-conscious areas, but it is not the same as waterproofing.
This is especially important in bathroom remodeling.
A painted bathroom wall outside the shower is one condition. A shower wall that receives direct water every day is another condition. Shower walls, tub surrounds, benches, niches, steam showers, and direct water-exposure areas require the correct approved backing and waterproofing system, not regular drywall.
Before inspection, the contractor should verify that the right wall material is installed in the right area.
A beautiful bathroom can fail later if the wrong material is installed behind the tile.
In a new ADU, the city or county drywall nailing inspection is a major milestone.
A detached ADU, attached ADU, or garage conversion ADU may include a bedroom, bathroom, kitchen, living area, laundry area, water heater, HVAC system, electrical panel or subpanel, ventilation, appliances, windows, doors, and fire-rated or separation details.
Before inspection, the contractor should verify drywall installation throughout the ADU. This may include standard drywall in dry rooms, moisture-resistant drywall in approved areas, tile-ready backing in wet areas, ceiling board, Type X drywall where required, and correct fastening throughout the unit.
ADUs are often smaller spaces, so mistakes are easier to notice later. Uneven walls, loose ceiling boards, wrong board types, missed garage separation details, or poor fastening can affect cabinets, tile, paint, trim, fixtures, and final inspection.
Passing the drywall nailing inspection helps the ADU move forward toward finish work with confidence.
In a home addition, drywall nailing inspection helps confirm that the new space is properly prepared before it blends into the existing home.
A home addition may include a new bedroom, expanded kitchen, family room, second-story addition, bathroom, laundry room, office, or larger living area.
Before inspection, the contractor should review drywall panel layout, fastener spacing, ceiling board installation, wallboard installation, separation areas if required, moisture areas, old-to-new transitions, door openings, window returns, beam areas, soffits, and approved plan details.
Home additions often include transitions between new construction and existing construction. These transitions must be handled carefully because they affect the final appearance after tape, mud, texture, primer, and paint.
A good drywall nailing inspection helps the addition move forward without avoidable delays.
Bathroom remodeling requires careful drywall and wallboard inspection because bathrooms include moisture, plumbing, tile, mirrors, lights, exhaust fans, niches, vanities, towel bars, shower glass, and accessories.
Before city or county inspection, the contractor should confirm which areas are dry areas, which areas are moisture-conscious areas, and which areas are wet tile areas.
Dry painted walls may use appropriate drywall materials. Moisture-conscious areas may use approved moisture-resistant drywall where allowed. Shower walls, tub surrounds, niches, benches, steam showers, and other wet areas require approved backing and waterproofing.
This is one of the most important distinctions in bathroom remodeling.
Moisture-resistant drywall is not waterproofing.
The right material must be installed in the right location before the project moves forward.
Before scheduling the city or county drywall nailing inspection, the contractor should confirm that the project is ready.
The approved plans should be on site. The permit card should be available. Required prior inspections should be approved. Correction notices should be completed. Drywall should be installed and fastened. Fasteners should be visible. Garage separation areas should be complete. Fire-rated areas should be complete where required. Moisture-area materials should be correct. Electrical boxes should be properly set. The job site should be safe and accessible.
The contractor should also walk the job before the inspector arrives.
A city or county inspection should not be scheduled too early. Calling too soon can create delays instead of saving time.
A drywall nailing inspection may fail for several reasons.
Common issues include missing fasteners, improper screw spacing, screws set too deep, screws not set deep enough, wrong drywall thickness, damaged panels, missing Type X drywall where required, incorrect garage separation drywall, wet-area board problems, electrical boxes set incorrectly, large gaps around openings, unfinished correction items, missing approved plans, unsafe site conditions, or drywall covered before inspection.
Many of these issues can be prevented with a contractor walkthrough before the inspection appointment.
The goal is not only to pass inspection.
The goal is to protect the finished home.
After the drywall nailing inspection passes, the drywall crew can usually move forward with drywall finishing.
This may include taping and mudding joints, installing corner bead where needed, applying multiple coats of joint compound, sanding the drywall finish, preparing a smooth finish or texture finish, applying orange peel texture or knockdown texture where specified, completing skim coat finish where required, preparing paint-ready finish, and coordinating tile-ready finish in approved areas.
After drywall finish, the project can move into primer, paint, tile, cabinets, flooring, trim, doors, fixtures, punch list work, and final inspection.
Passing the drywall nailing inspection is a major milestone because it allows the project to move from open verification into finish preparation.
The drywall nailing inspection is not the same as a final drywall quality inspection.
The local inspection focuses on code-related items and approved plan requirements before the drywall is covered. After the inspection passes, the contractor still needs to manage finish quality.
That may include joint inspection, surface inspection, texture inspection, sanding review, paint-ready inspection, patch blending, corner review, punch list inspection, and final drywall inspection.
This second level of review matters because the city inspector is not there to approve every cosmetic detail. The contractor still needs to make sure the finished drywall looks clean, straight, blended, and ready for the homeowner.
City approval allows the project to continue.
Contractor quality control helps deliver the final result.
After the drywall nailing inspection passes, the project moves toward drywall finish.
Different areas may require different finish expectations.
A Level 0 finish means drywall is installed but not taped or finished.
A Level 1 finish may be used in concealed areas where appearance is not important.
A Level 2 finish may be used in garages, storage areas, service areas, or certain tile-ready locations depending on the project.
A Level 3 finish may be used where heavy texture will be applied.
A Level 4 finish is common for many residential walls and ceilings with standard paint and texture.
A Level 5 finish is a higher finish level often used for smooth walls, critical lighting areas, high-end homes, dark paint, glossy paint, large open walls, and areas where imperfections would be more visible.
Common finish options include smooth finish, texture finish, orange peel texture, knockdown texture, skim coat finish, paint-ready finish, and tile-ready finish.
The finish level should match the room, lighting, surface, and homeowner expectations.
Texture matching is one of the hardest parts of remodeling.
In new residential construction or a new detached ADU, texture is usually more consistent because all drywall is new. In remodeling, new drywall often has to blend into existing walls or ceilings.
Existing surfaces may have orange peel texture, knockdown texture, skip trowel, smooth finish, old paint layers, previous patches, settlement, or uneven surfaces. Even when the drywall crew does good work, perfect texture matching is not always guaranteed.
Sometimes a small patch can be blended. Other times, it may be better to re-texture or repaint a larger wall or ceiling section so the repair blends more naturally.
A good contractor should explain this before final paint so the homeowner understands the difference between a patch, a blend, and a full wall or ceiling finish.
Remodeling often requires patch and repair drywall work.
Walls may be opened for electrical, plumbing, HVAC, framing, insulation, windows, doors, water damage repair, structural changes, or layout modifications.
Patch work should be reviewed carefully because patches can become visible after paint if they are not blended correctly.
The contractor should check patch thickness, seams, sanding, texture match, corner transitions, ceiling patches, and paint-ready finish.
In some cases, a patch can be blended into the existing wall. In other cases, the entire wall or ceiling may need to be refinished or repainted for a cleaner result.
A good patch should not draw attention after the project is complete.
A good contractor should understand more than drywall installation.
The contractor should understand inspection sequencing, approved plans, permit cards, garage separation, fire-rated assemblies where required, moisture areas, rough inspections, insulation inspection, drywall nailing inspection, finish quality, punch list work, and final approval.
Drywall connects with framing, insulation, electrical, plumbing, HVAC, fire-rated assemblies, moisture control, waterproofing, tile, cabinets, doors, trim, flooring, painting, fixtures, and final inspection.
At Global Arch Construction, we help homeowners manage the full process for new ADUs, home additions, garage conversions, kitchen remodels, bathroom remodels, whole-home renovations, fire damage restoration, custom homes, and design-build projects.
We serve homeowners across Sacramento, Roseville, Rocklin, Granite Bay, Citrus Heights, Folsom, San Rafael, Mill Valley, Corte Madera, San Francisco, Napa, North Highlands, Paradise, El Dorado Hills, Santa Rosa, and surrounding Northern California communities.
If you are planning a new ADU, home addition, garage conversion, kitchen remodel, bathroom remodel, whole-home renovation, or custom home project, contact Global Arch Construction to discuss your next step.
A drywall nailing inspection is a local building department inspection after drywall panels are installed and fastened, but before the fasteners and joints are covered with tape, mud, texture, primer, or paint.
Many projects use drywall screws, but the inspection is still commonly called drywall nailing inspection. The inspector is checking how the drywall is fastened to the framing.
It should usually be scheduled after drywall installation is complete and before taping, mudding, sanding, texture, primer, paint, cabinets, tile, or trim begin, if the inspection is required by the permit card or local building department.
If the local building department requires a drywall nailing inspection, the fasteners should remain visible. Covering screws or nails too early may cause inspection problems.
The inspector may check fastener spacing, fastener depth, drywall type, drywall thickness, panel installation, ceiling board, wallboard, garage separation, fire-rated areas where required, electrical box openings, and wet-area materials.
Yes, if required by the local jurisdiction. ADUs may need drywall nailing inspection for walls, ceilings, bathrooms, kitchens, garage conversion areas, and separation assemblies shown on the approved plans.
A permitted garage conversion may require drywall nailing inspection, especially where garage separation, ceiling board, wallboard, insulation, new living-space assemblies, and Type X drywall where required are involved.
Not always. Garage separation requirements depend on the approved plans and the specific condition. Some areas may require gypsum board, while ceilings below habitable rooms may require 5/8-inch Type X gypsum board or equivalent. The contractor should follow the approved plans and local inspection requirements.
Type X drywall is a fire-resistant gypsum board used in certain rated wall and ceiling assemblies, garage separation conditions, ADU separation areas, duplex conditions, or ceilings below habitable rooms when required by approved plans.
The contractor must correct the items noted by the inspector and schedule a reinspection before moving forward with covered finish work.
After approval, the drywall crew can usually tape and mud joints, sand drywall finish, install texture, prepare for primer and paint, and coordinate the next finish stages.
It means the existing drywall is not part of the work scope and should remain in place. The area should be protected and not disturbed unless the approved scope changes.
It means the area is outside the limits of work. No drywall repair, replacement, or finish work is required there unless otherwise stated in the contract or approved change order.
Drywall inspection matters because once tape, mud, texture, paint, tile, cabinets, flooring, and trim are installed, drywall corrections become harder and more disruptive.
Contact Global Arch Construction today to discuss your new ADU, home addition, garage conversion, kitchen remodel, bathroom remodel, whole-home renovation, fire damage restoration, or custom home project.
Our team can help with planning, design-build, permits, framing, rough mechanical, electrical, plumbing, insulation, drywall installation, city or county drywall nailing inspection, finish work, punch list items, and final approval throughout Northern California.
From residential remodeling to commercial construction
.webp)